Your Guide to Crafting the Perfect Tree of Life
The Tree of Life is one of those projects that can grow with you. You can make it as a small pendant, a delicate wall hanging, or something much larger. Whatever size you choose, the proportions between the circle, cord thickness, and cord length matter.
Over the years, I have created and tested Tree of Life designs in many different sizes. In this guide, I’ll show you how these elements work together, how to choose the right materials for a tutorial, and when it makes sense to experiment with your own variations.
Understanding Proportions
The most important thing to understand about a Tree of Life is that its materials work together.
The circle size, cord thickness, cord length, and structure of the design all affect the final proportions.
And there is one thing I have learned through a lot of testing:
The biggest mistake is usually not a badly tied knot.
A knot can be untied and corrected.
The much more difficult problem is starting with materials that do not work well together.
I often receive messages from makers who already have a particular circle and cord and ask which Tree of Life tutorial they should choose. Unfortunately, it doesn’t quite work that way.
For example, a small circle combined with relatively thick cord can make the design too dense, leaving too little space for the structure of the tree.
It took me a lot of time — and quite a lot of cord — to find the combinations that create balanced proportions in my different Tree of Life designs.
That is why my first recommendation is simple:
Choose the tutorial first. Then choose the materials recommended for that design.
Choose Your Tutorial First
The material recommendations in my Tree of Life tutorials are part of the design.
The recommended circle size, cord thickness, and cord lengths have been tested together to create the proportions shown in the finished project.
So instead of starting with:
“I have this circle and these cords. Which tutorial can I use?”
I recommend starting with:
“Which Tree of Life would I like to make?”
Then check the tutorial and prepare the materials it recommends.
This approach can save you time, cord, and frustration — especially when you are making a Tree of Life for the first time.
Once you have successfully made the design, you will also have a much better understanding of how its proportions work. That is when experimenting becomes much easier.
Find the Right Materials
Below you’ll find recommended dimensions and guidance for each version.
To make things simpler, I’ve prepared a selection of materials from Etsy shops around the world. These suggestions can help you find what you need, wherever you are.
Affiliate Disclosure: I may earn commissions from products mentioned in this post, which helps support our site and content creation #ad #etsycreatorco #perlesandco

35 cm Circle, 80-90cm Length
A well-balanced size that closely reflects the original design.

35cm Circle, 80-90cm Length, with Wooden Beads
A balanced and beginner-friendly version of the classic design.

30cm Circle, 70-80cm Length
A slightly more compact large version.

25 cm Circle, 60-70cm Length
Elegant and versatile.

20 cm Circle
Perfect for subtle wall décor or gift pieces.

15 cm Circle
Ideal for delicate decorative accents, smaller spaces, or meaningful handmade keepsakes.
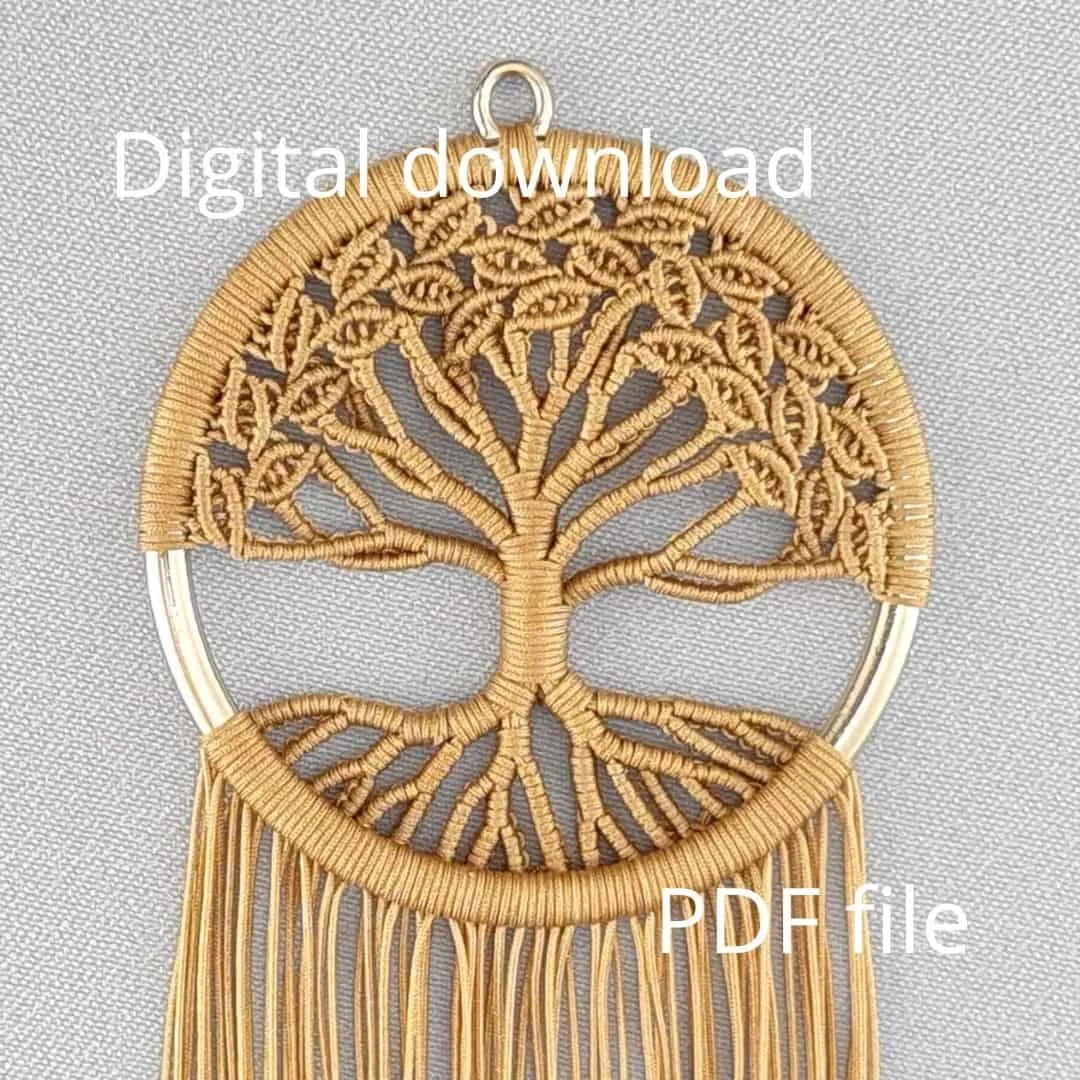
6 cm Circle (pendant)
For this project, I used a 5.5 cm circle, but a 6 cm circle works just as well and is often easier to find.
Recommended Suppliers by Country
🇨🇦 Canada, Unfettered Supply – wide range of cords and rings in multiple sizes!
🇳🇱 Holland, Leuke Dingen Loods – beautiful cord shades and possible circle options
https://www.leukedingenloods.nl
🇫🇷 France, Perles and Co – jewelry accessories and micro macramé threads
🇵🇱 Poland, (shipping across EU & UK) Fabryka Sznurka – full range of rings and matching cords
If you’re looking for materials in another country, feel free to message me — I’m always happy to help.
Choose Your Design
If you’re looking for a classic, balanced wall-hanging version, the copper Tree of Life on a 35 cm circle is a beautiful choice. Its structure, spacing, and density create a harmonious composition that works especially well as wall décor.
If you have never made a macramé project before, consider starting with:
In these versions, the leaf technique has been designed so that the leaves remain evenly spaced and consistently shaped. This makes the process more predictable and beginner-friendly, helping you achieve a clean and satisfying result — even if it is your first project.
Starting with one of these designs can help you build confidence before experimenting with other variations.
Scale the Design
The Tree of Life has a scalable structure, so you can create larger or smaller versions while keeping the proportions of the design.
For example:
A 25 cm circle creates a balanced medium-sized wall piece
A 35 cm circle gives you a classic large statement tree
A 50 cm circle becomes a bold, eye-catching centerpiece
To scale the design successfully:
Use slightly thicker cord
Adjust cord length proportionally
Maintain even tension for symmetry
The pattern logic stays the same — only proportions change.
Scaling does not mean that any circle can be combined with any cord.
Once you understand how the different elements work together, scaling becomes much easier to do intentionally.
Get Help When You Need It
If you’re unsure about sizing, materials, or adjustments, you can always reach me at hello@ewimacrame.com.
You can also share photos of your progress or questions by email — almost like sitting together at a workshop table.
I’m here to help you craft with confidence.
German PDF Versions Now Available
Due to strong interest from German-speaking makers, selected Tree of Life PDF patterns are now available in German.
If interest continues to grow, additional translations may be introduced in the future.
Thank you for helping this creative space expand internationally!
Video or PDF Tutorial?
Not sure whether to learn from a video tutorial, PDF pattern, or Membership?
👉 Read: How to Learn Micro Macrame: Choosing Between Video Tutorials, PDF Patterns & Membership
Start Your Tree of Life Journey
Choose your tutorial.
Prepare the recommended materials.
Follow the proportions.
Then begin knotting your Tree of Life.
Once you have made your first design, you can start experimenting with different sizes, materials, and your own ideas.
Thank you for letting me be part of your creative process.
Warmly,
Ewi
View PDF tutorials by EwiMacrame | Tree of Life in Macrame: Knotting Beauty and Meaning